How to make stunning AR-Materials
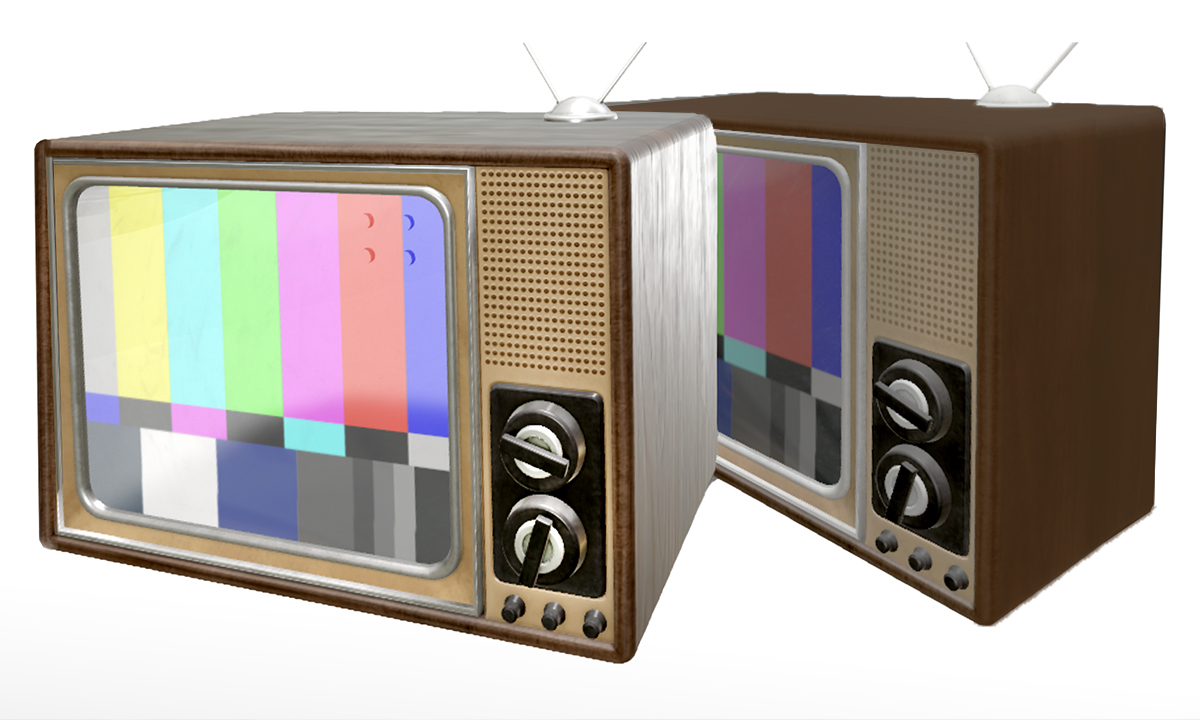
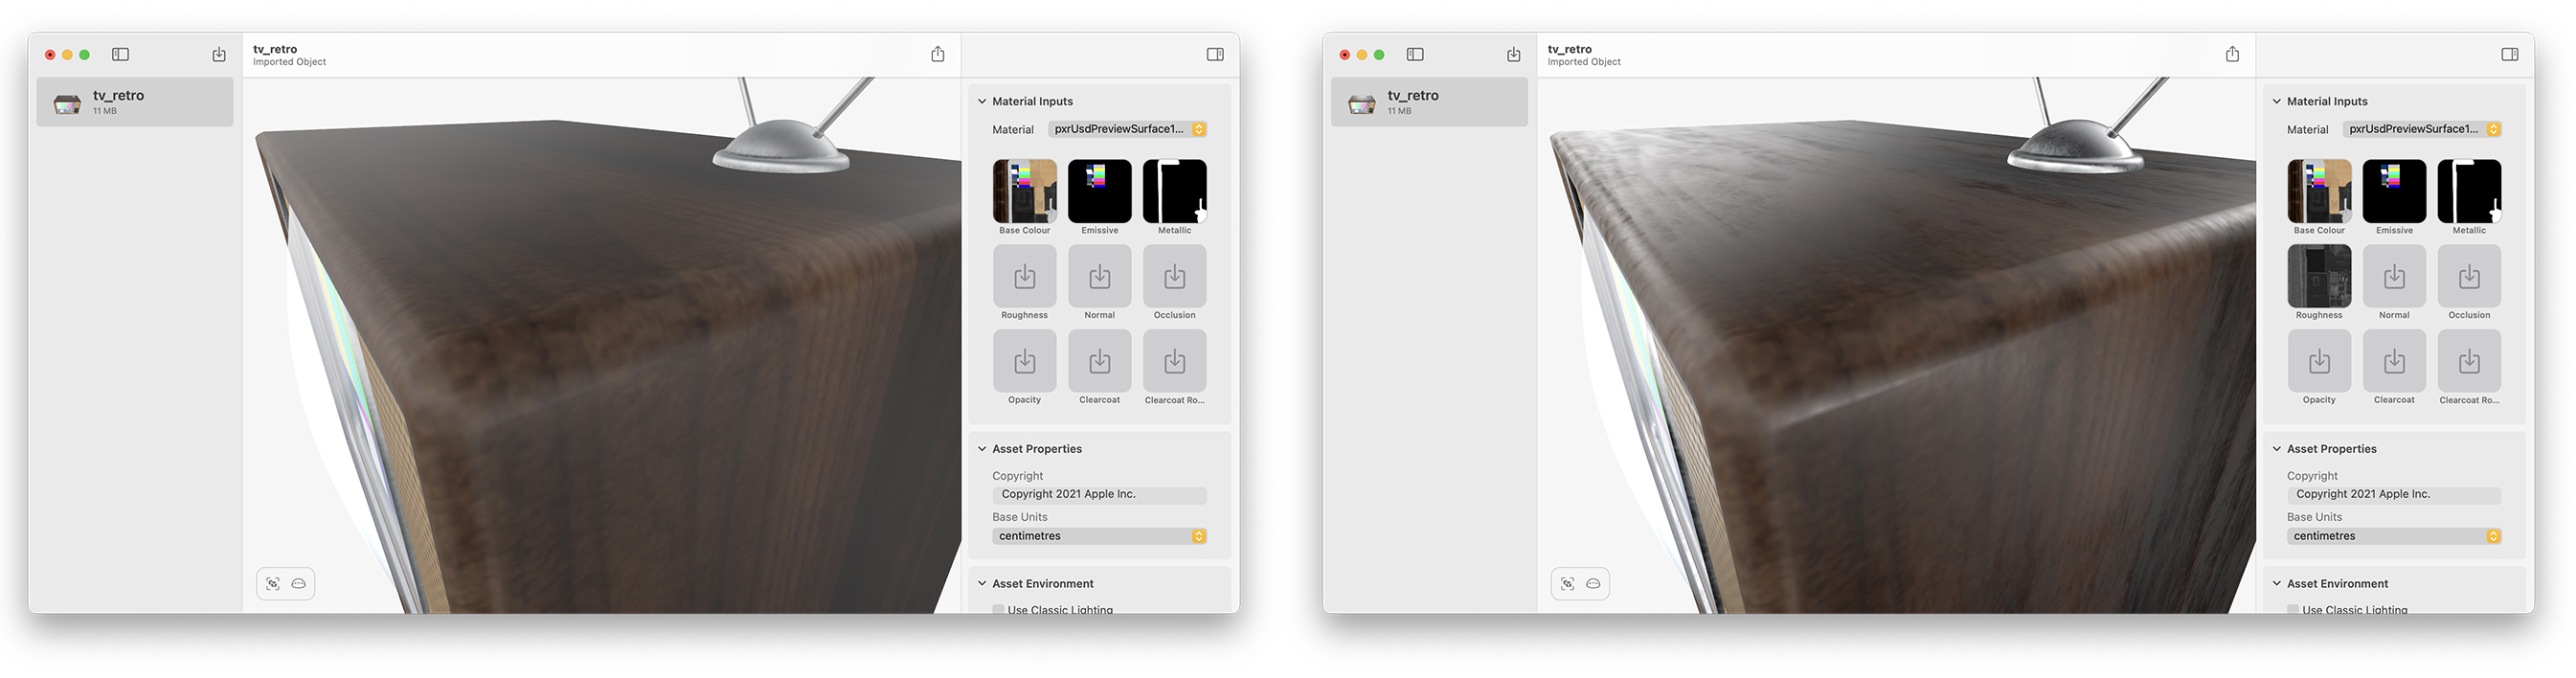
Anyone who has experienced artworks or NFTs in augmented reality may have wondered why they usually don't look as hyper-realistic as they tend to do in 3D renderings. Obviously, both technologies work with 3D models that are digitally displayed on 2D screens. The lack of realism is, of course, due to the fact that hyperrealistic renderings are graphically more complex and require immense computational power for realistic material and light calculations. This process is normally achieved over a longer period of time (duration depending on the processing and graphics capabilities of your device). For augmented reality on mobile devices with limited computing power, these capacities are nowhere close to being available on the fly, and you want the calculations to happen in real-time, ideally at 60 frames per second, meaning 60 rendered images per second. The term «real-time» however, probably plays the most important role as you want the realistic lighting and physical environment to impact the surface of your 3D models. You can absolutely pre-render the calculated light, often referred to as baking the light, but depending on the environment, your models will most likely look «out-of-place». That's why materials play an integral role in creating the illusion of realism in augmented reality. It is crucial here that not only a colored texture is applied to the geometry, but to also add a variety of material properties such as roughness, metallic levels, and normal maps. Materials that define these different texture properties can therefore behave realistically to the real light source thus are called Physical Based Rendering (PRB) materials. In addition, there are other tweaks that can help objects look realistic. Physical Based Rendering materials describe the surface properties in a physically accurate way. As a result, they always look different and realistic in different ambient light conditions. Various parameters are available for defining this in detail. The Base Color describes the coloring of the surface of your 3D object. If an object was painted with a brush and paint, this color would correspond to the base color. This does not give us any details about the physical consistence or quality – basically, the feel of the material. This property is also not influenced by light. Nevertheless, structures like reliefs, which cast quite a few shadows, can be baked into the Base Color in order to save polygons. If you'd like to take a little deep dive, we can highly recommend this tutorial by Jayanam. 100% metallic reflections create a look equivalent to bare metal. If the roughness is also set very low, the material will have specular characteristics. For this scenario, please have in mind the camera in AR mode only calculates a rough image of the environment, and only does this every couple of seconds. This implies real reflections (in real-time) cannot be displayed despite using PBR materials, for example like a mirror. Also, depending on the UV map, different grey scale areas can cause less metallic effects on the object. Here it is defined how refracted the ambient light is emitted from the surface. The lower this value, the smoother and shinier the material appears. With a UV Map, you can define if certain parts or areas of the 3D model are be given different levels of roughness here. If you want to know how to properly map a UV map in a 3D program, take a look at this tutorial by InspirationTuts. Since the render engine reads the value from this color area from the applied gray tone, white areas mean glossiness while black areas mean high level of roughness. Corresponding shades of gray thus described different intensities of gloss or roughness. In a normal map, structures and fine details that would otherwise have to be represented by polygons can be baked into a 2D image. This allows us to reduce the number of polygons to a minimum and thus reduce file size. In the Normal Map, vector data of the X, Y, and Z axes are converted to RGB values and saved that way. This is a crucial and very common step in asset optimization and helps to reduce a 3D assets complexity to make it game- or mobile-ready. Transparency or blending describes how opaque the materials are supposed to be in certain places. If a monochrome, uniform grayscale image is placed here, the entire object has the same opacity. White means opaque, black stands for the exact opposite, resulting in fully transparent. All gray tones in between result in a respective semi-transparency. Depending on the UV mapping, certain parts or areas of the 3D model can also be made transparent. The UV Map references the 2D Textures on you 3D Model. It stores the data about which part of the 3D model should be covered with which part of your texture image. You can edit the UV map in the 3D program. See also the tutorial from InspirationTuts. The principle of Ambient Occlusion is that an object casts shadows not only on the ground and the environment but also on itself. These shadows can be baked out of 3D programs with Ambient Occlusion settings. There are numerous good resources and instructions how to create Ambient Occlusion on the internet. If you are using Cinema4D this linked video is very helpful. The baked out texture can be applied as material property «Occlusion» in the Reality Converter as you can see in the images below. Highlights make your 3D model stand out even more. They can be a mix of several material properties that you can apply specifically or globally to your model. You can find some examples here. This pretty much wraps our little overview over (PBR) materials and a detailed look into surface properties of 3D models in AR. We can't wait to see what you'll be creating! Ready to make the world your canvas?
Want to hear a little fun anecdote? For Pixar’s first «Toy Story» movie, a single frame took between 45 minutes and 30 hours to render. Obviously, computer graphics have evolved quite a bit since the 90s, but it paints a good picture of the intensity of the graphical task that needs to be executed 60 times within a single second and how much work the hardware has to do here.

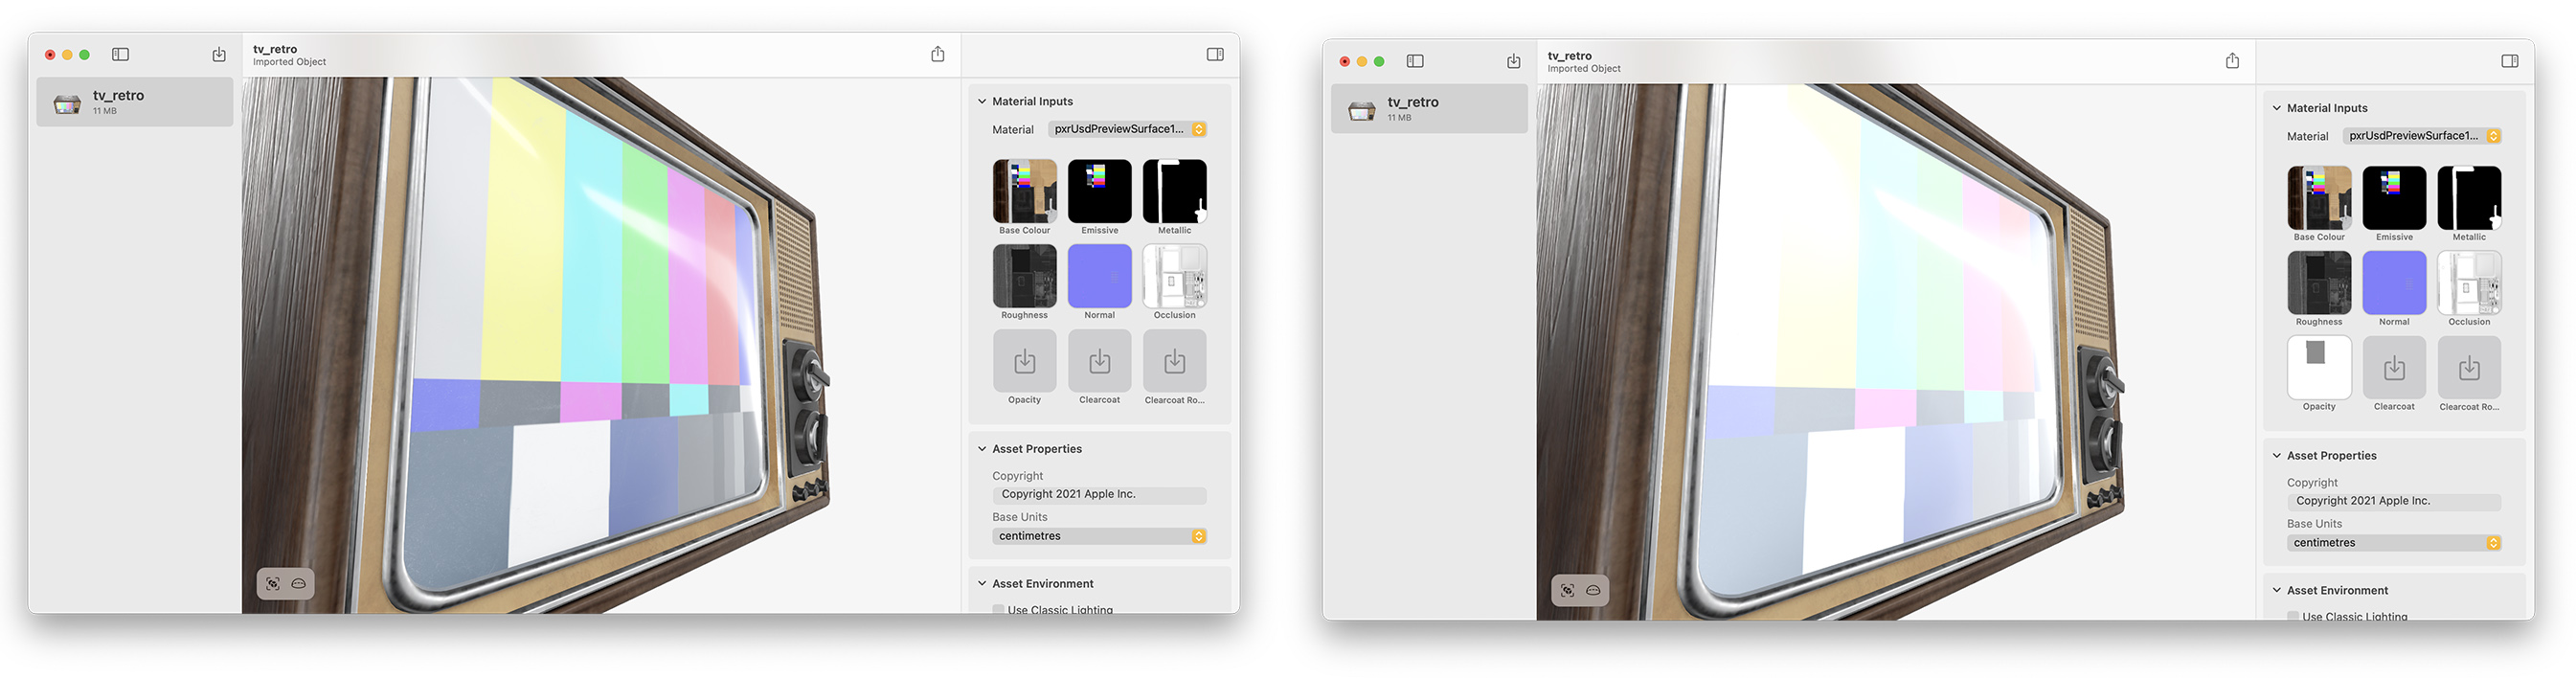
Let's take a closer look, shall we?PBR materials in detail
Apple's Reality Converter is an excellent tool to view and edit them individually.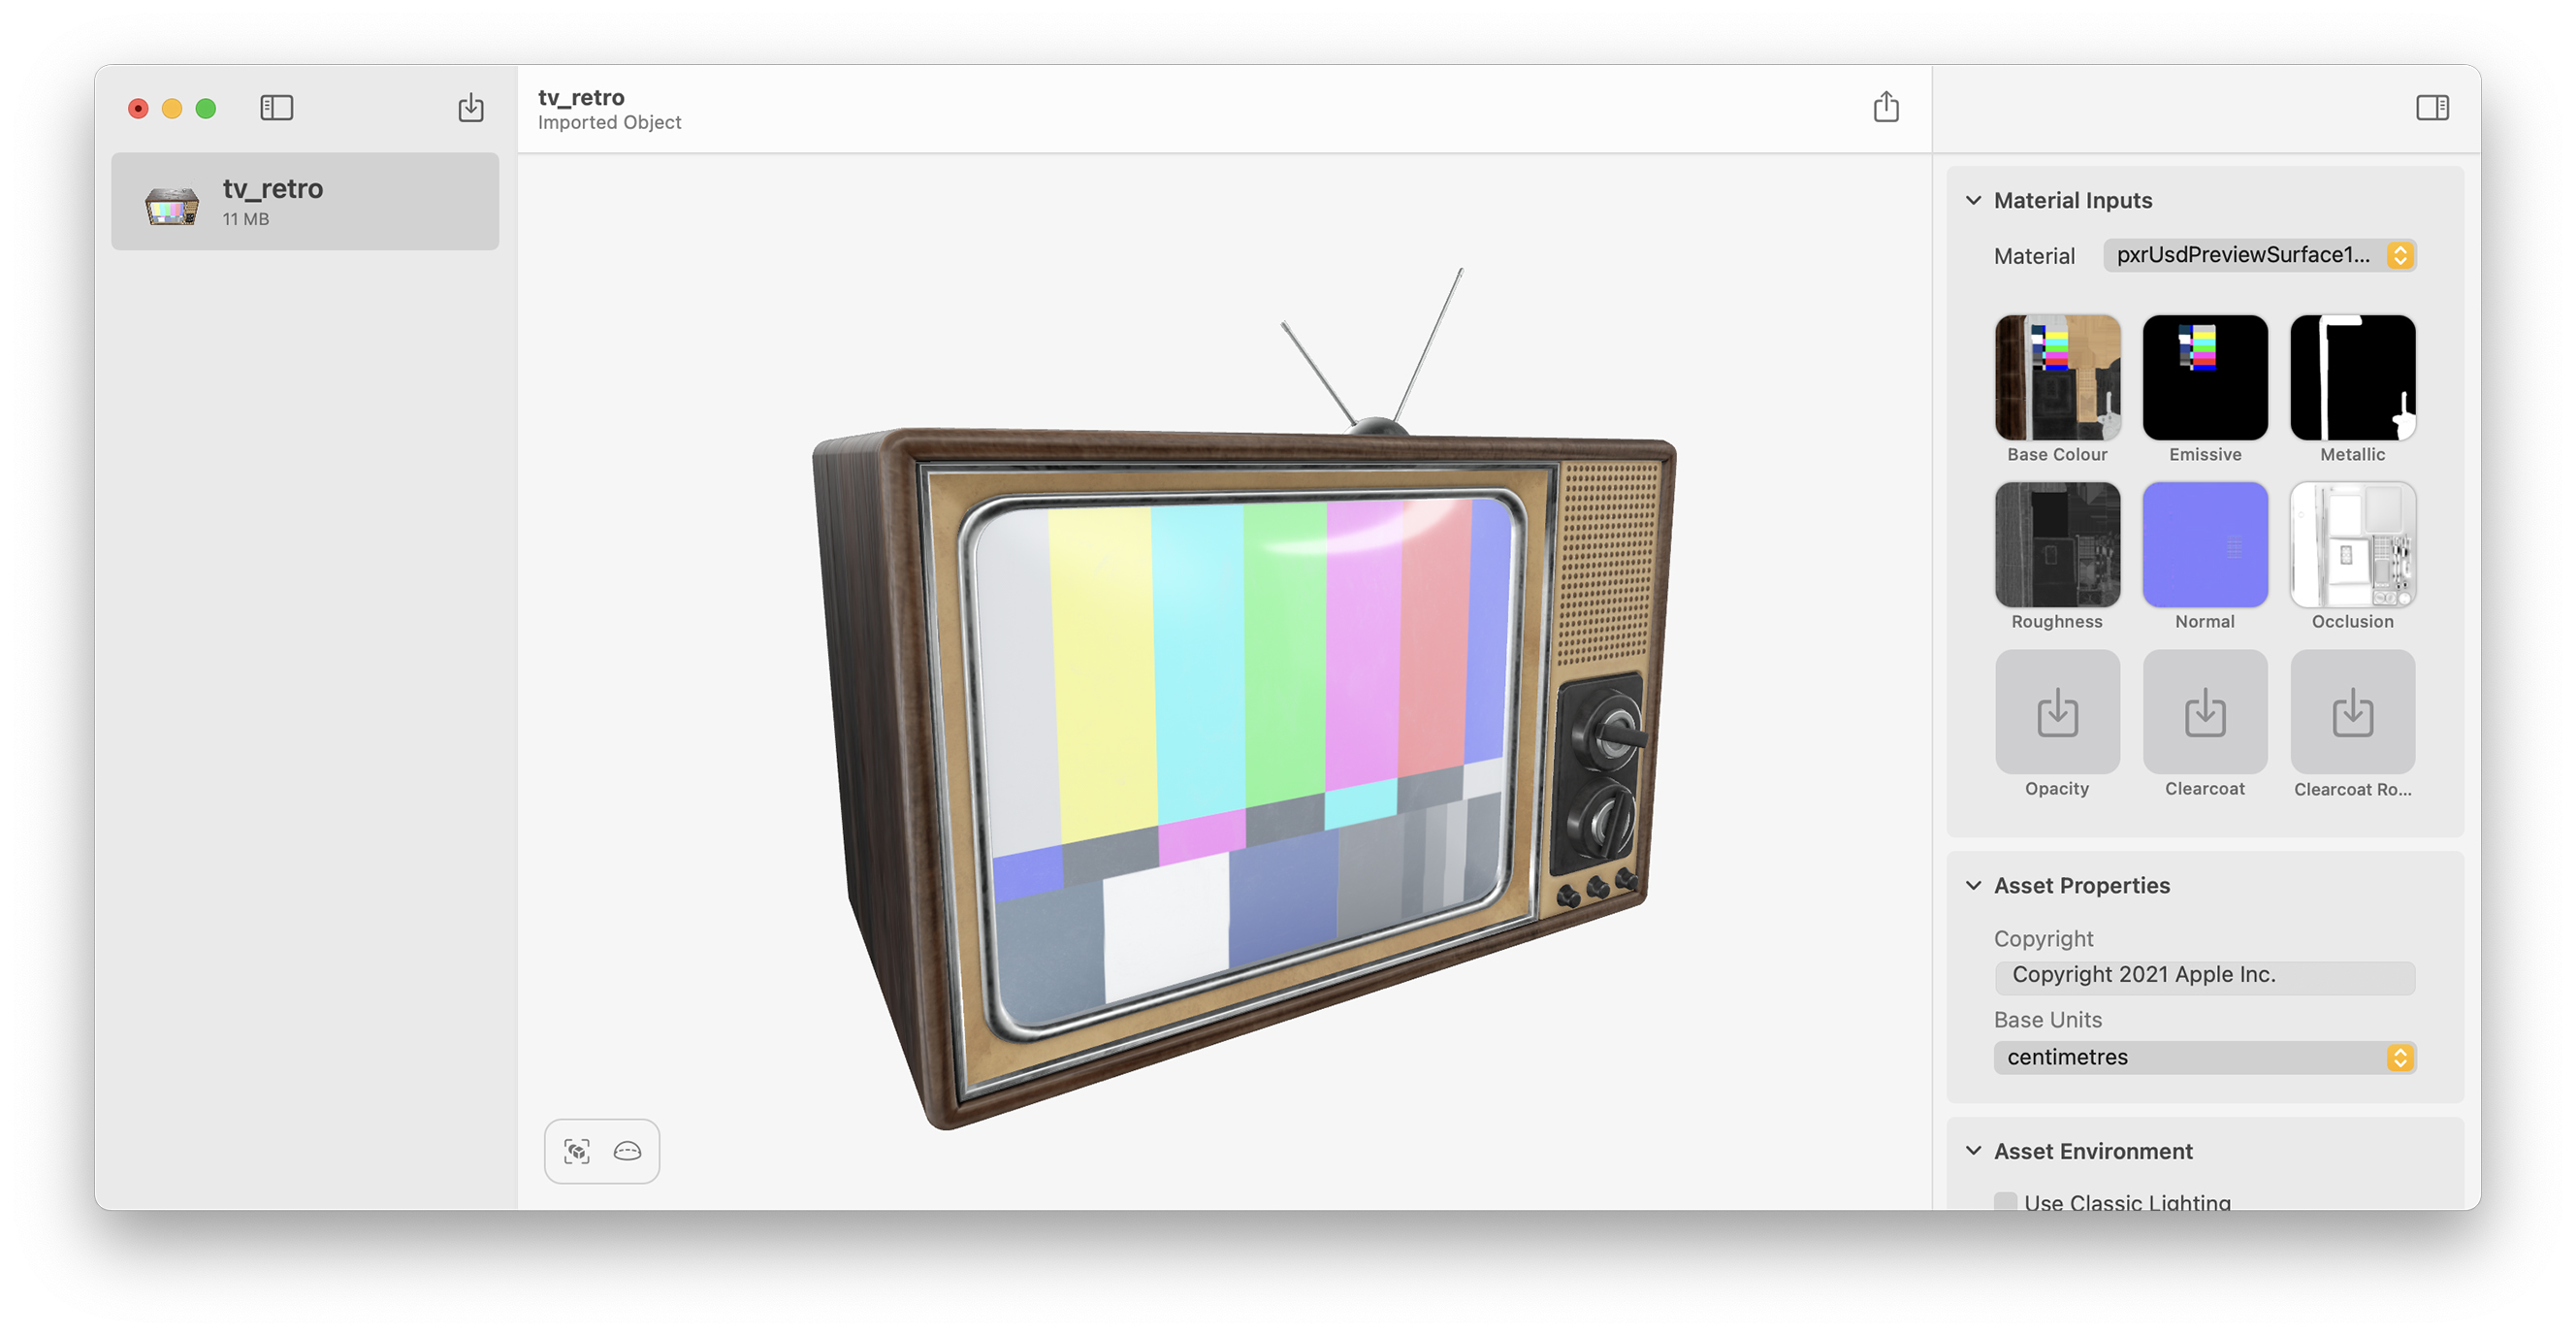
Base Color

Metallic reflections

Roughness
Normal Map
RealityKit, the AR render engine on the Apple's operating system (iOS), can then use this data to calculate how light interacts with the surface. A normal map can be created in 3D tools like Blender or Cinema4D. Helpful tutorials on this can be found here.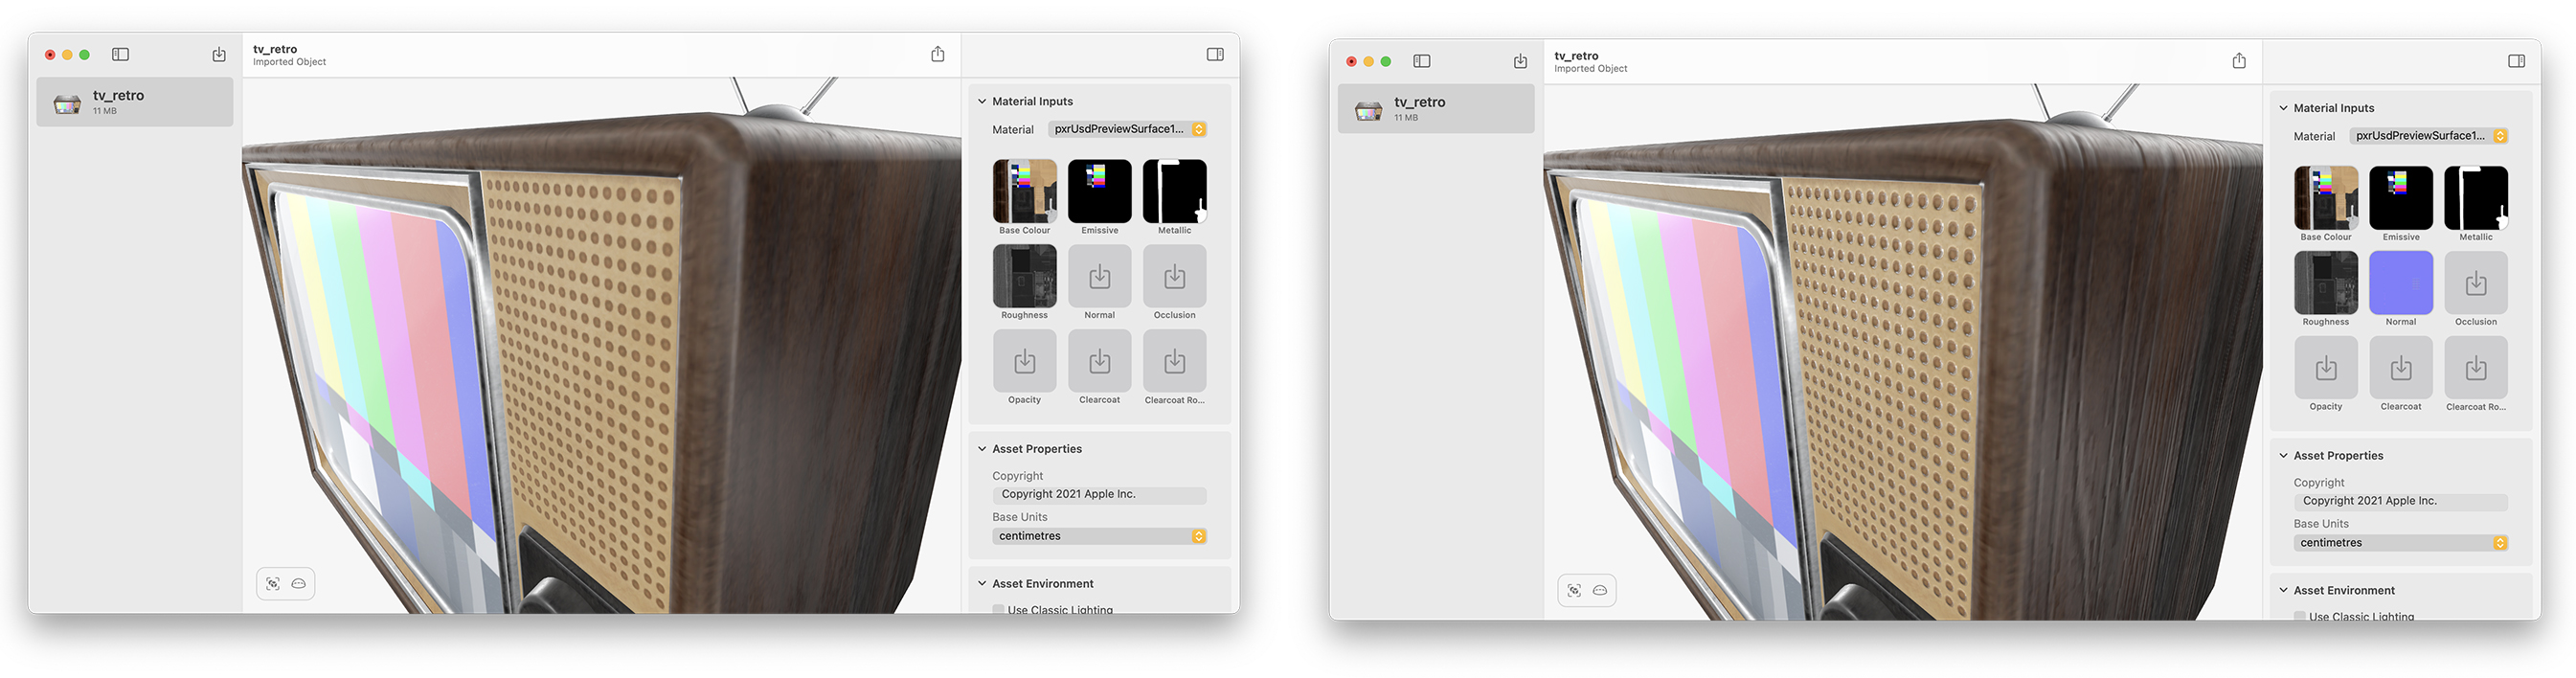
Transparency
Ambient Occlusion

Highlights
The simplest is probably the Clearcoat. This simulates a clear, glossy surface. You can also influence the roughness of the Clearcoat with Clearcoat Roughness. Specular, Sheen Color, Anisotropy and Light Emmissions are additional material properties that cannot be influenced in the Reality Converter, but can be influenced by code.
If you want to take a deep-dive and don't fear to get your hands dirty with some programming, check out the Apple Developer Documentation about how to change Materials with shaders.
We hope this guide was helpful to you – in case you'd like a specific topic to be covered in greater detail, don't hesitate to let us know.
-
 Henriette Gressler
-
 Arthur Schiller